Hello everyone!!
Here is how I dye my hair at home with things I purchased at Sally’s Beauty for $9. Everyone can buy at Sally’s- you don’t need to be a hair stylist or cosmetologist. I was intimidated to go in there for a long time, and dyeing my hair this way didn’t even seem like an option. But it totally is, and it is WAY better than dyeing your hair from box! There is so much less damage than dyeing from a box, since those are “one size fits all” products. Think about that- the boxed dye at CVS needs to work on the thickest, coarsest, darkest hair types and still achieve a color similar to the box! For me, with my thin, light hair, I don’t need my dye to be in such overdrive! Using this products allows me to have the color I want with more control, personalization, and their higher quality means less damage.
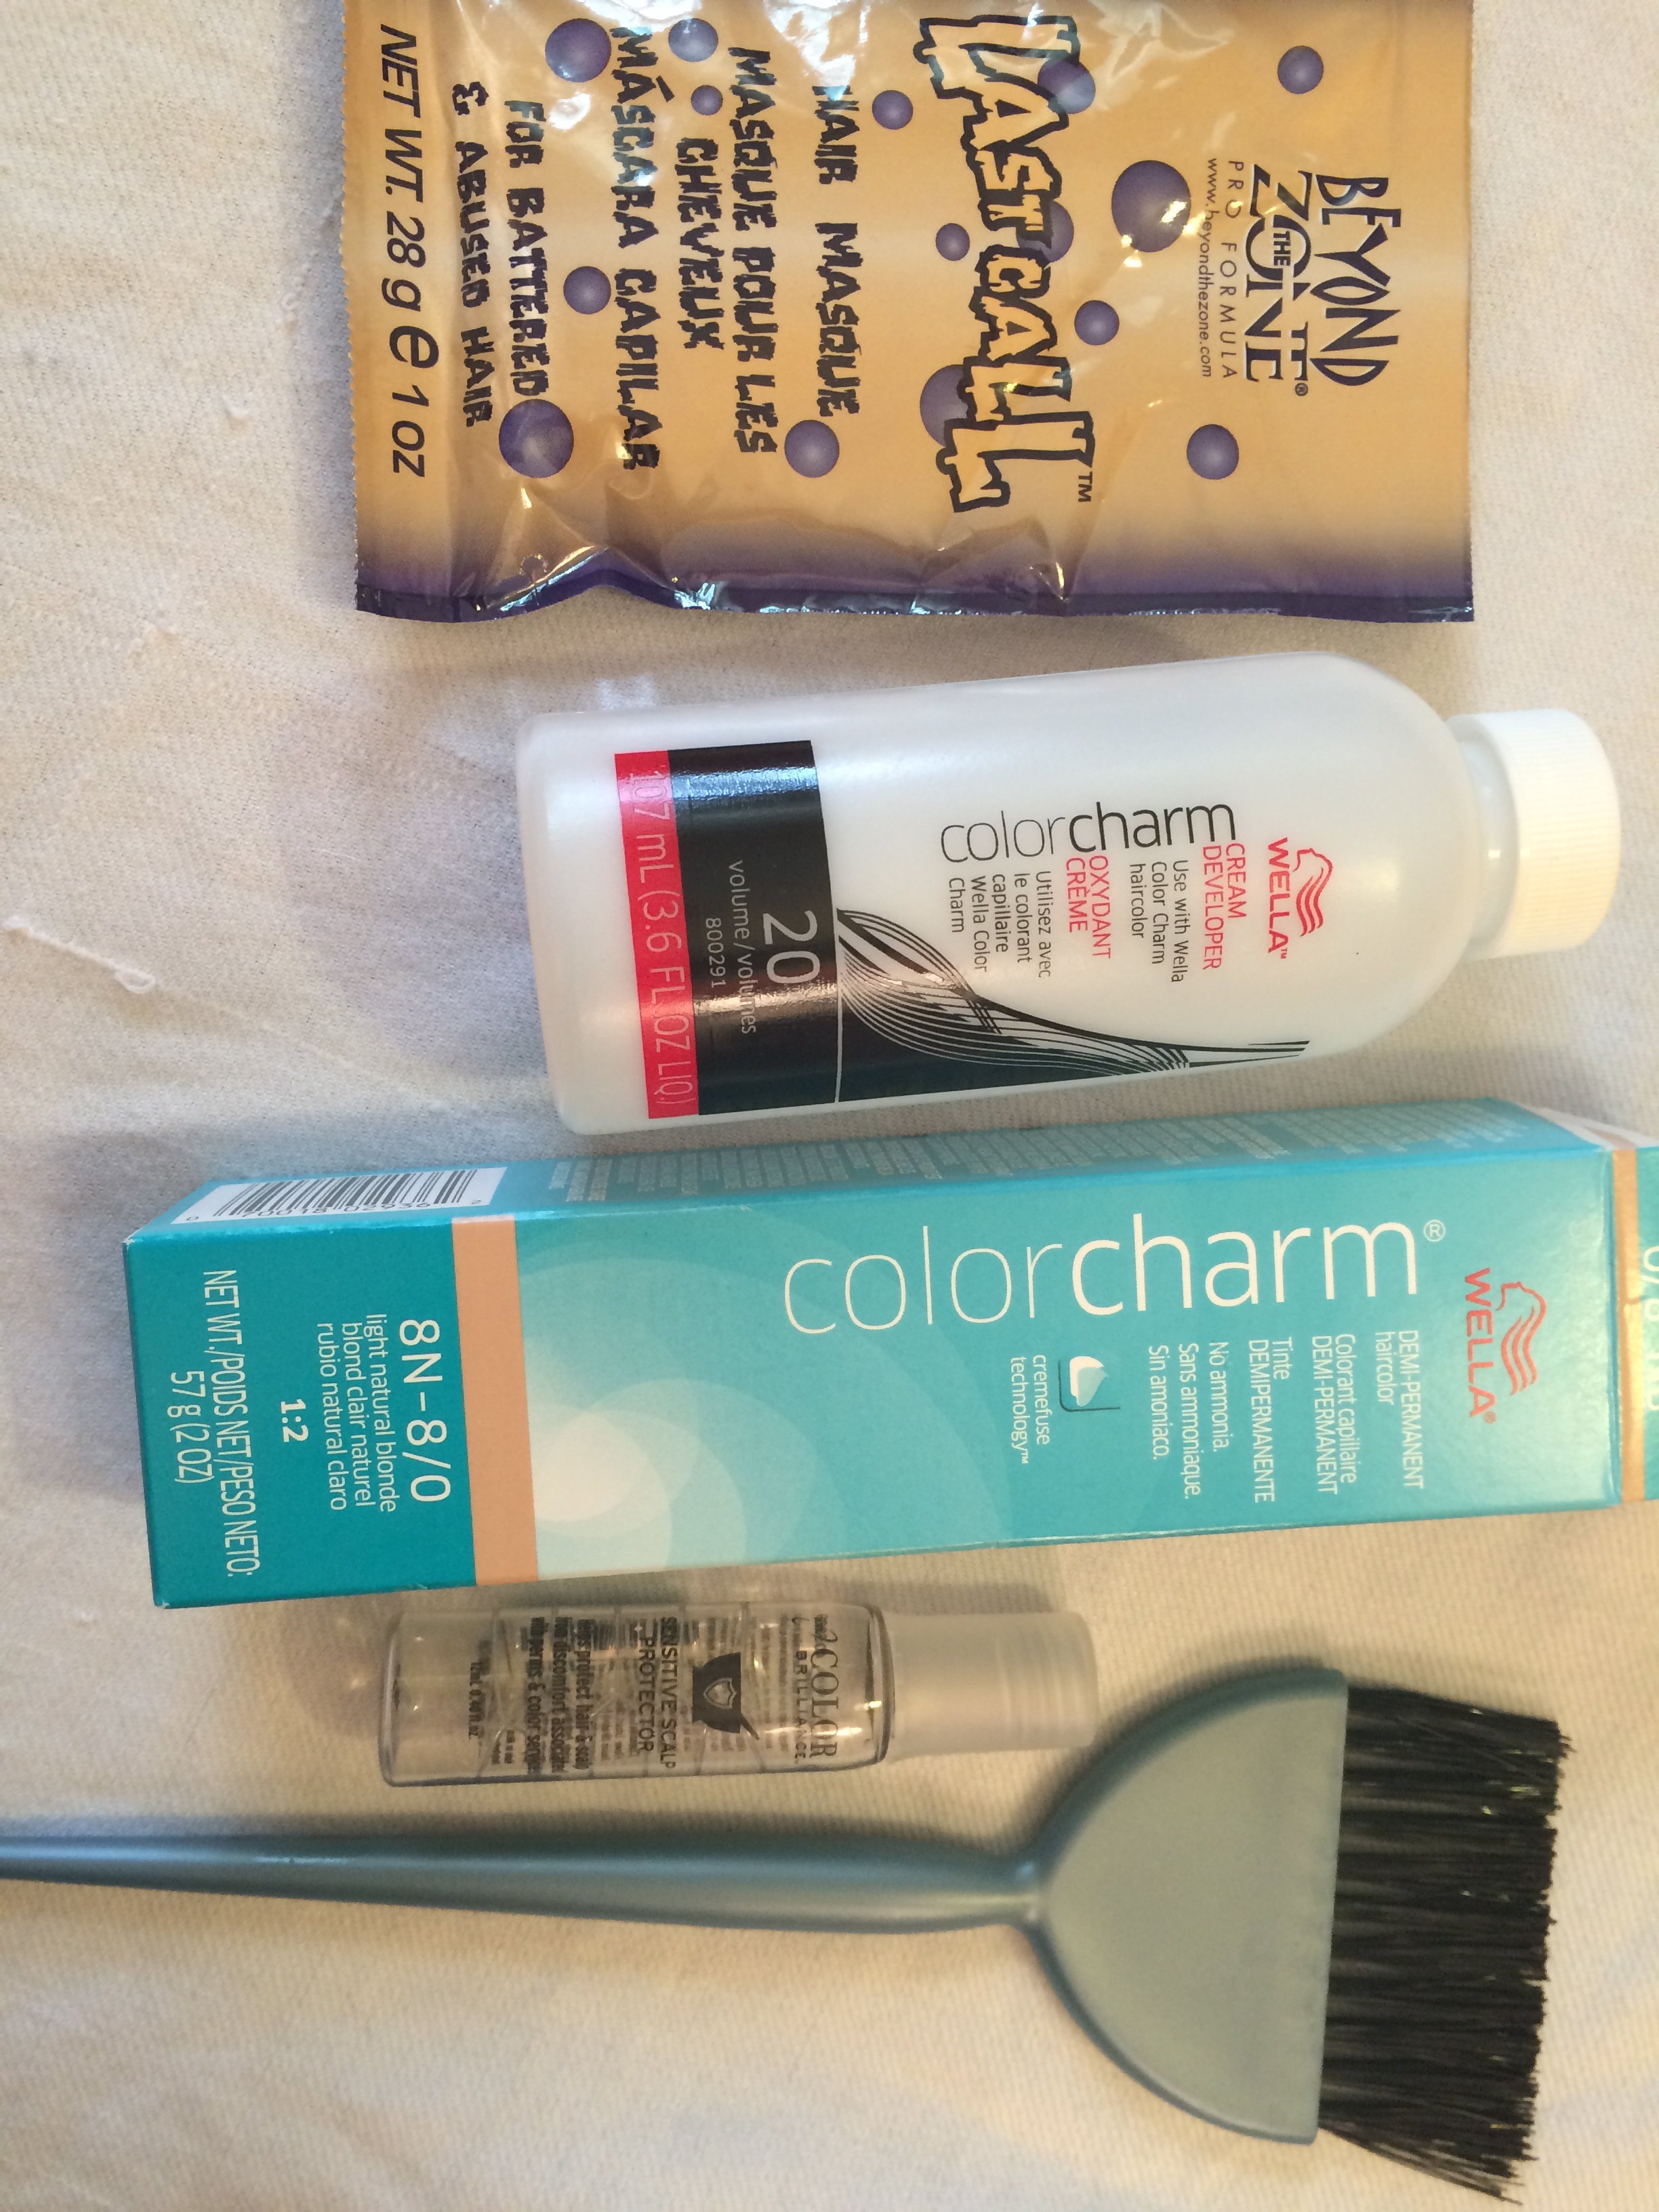
Here is what you will need:
-Disposable latex gloves. I buy mine from the grocery store in a pack of 12 for like $1.
-A plastic bowl to mix your products. I bought a cute professional one from Sally’s for $2 & just wash it out whenever I’m done.
-A brush to apply your hair dye, like the one in the picture above. They have skinnier ones for highlights and also bottles if that is more your style than brush/bowl.
-Hair mask for after you have dyed your hair and it needs the extra lovin’.
-The hair color itself & the developer
The developers come in 20 and 40. For those of us casually doing our hair at home in an old tee shirt, the 20 developer works just FINE! Also, pay attention to the ratio of developer to hairdye that your brand calls for. The one in the photo above called for 1:2, which ended up being 1 bottle of dye to 1.5 bottles of developer. Most of the time, I usually buy one box of dye and one bottle of 20 developer.
I also buy a tiny bottle of Sensitive Scalp Protector. I live and die by this stuff! I know there are tricks like putting Sweet N Low in your hair dye, but that sketches me out. I would never put Sweet N Low in my body, so it’s also unlikely that I’m going to have any laying around when it comes time to color my hair. Also, this stuff is designed to help protect your scalp. It works every time, and it mitigates 100% of itchiness during the 30 minute wait period. Even if you get your hair done at a salon, if you sit there wishing you could scratch the whole time its developing, I would suggest picking up a bottle of this stuff for $1.20 and giving it to your stylist.
As for what dye to get, Sally’s has tons of those little synthetic hair loops that show you what the color approximately will look like. These are surprisingly close to the real color, especially if you have lighter hair. I usually can spy what colors I like right away, and from there have to decide if it will look good on my skin tone (if you wanted to learn more about your skin tone and undertones, check my blog post here). I also try to be practical in my choices. There are certain beautiful blonde colors that I want to try, but I’ve been burned by the platinum hair lust before. I have to pick one that actually looks good on me and won’t require me to put more dye on my head in two days when my roots come in!
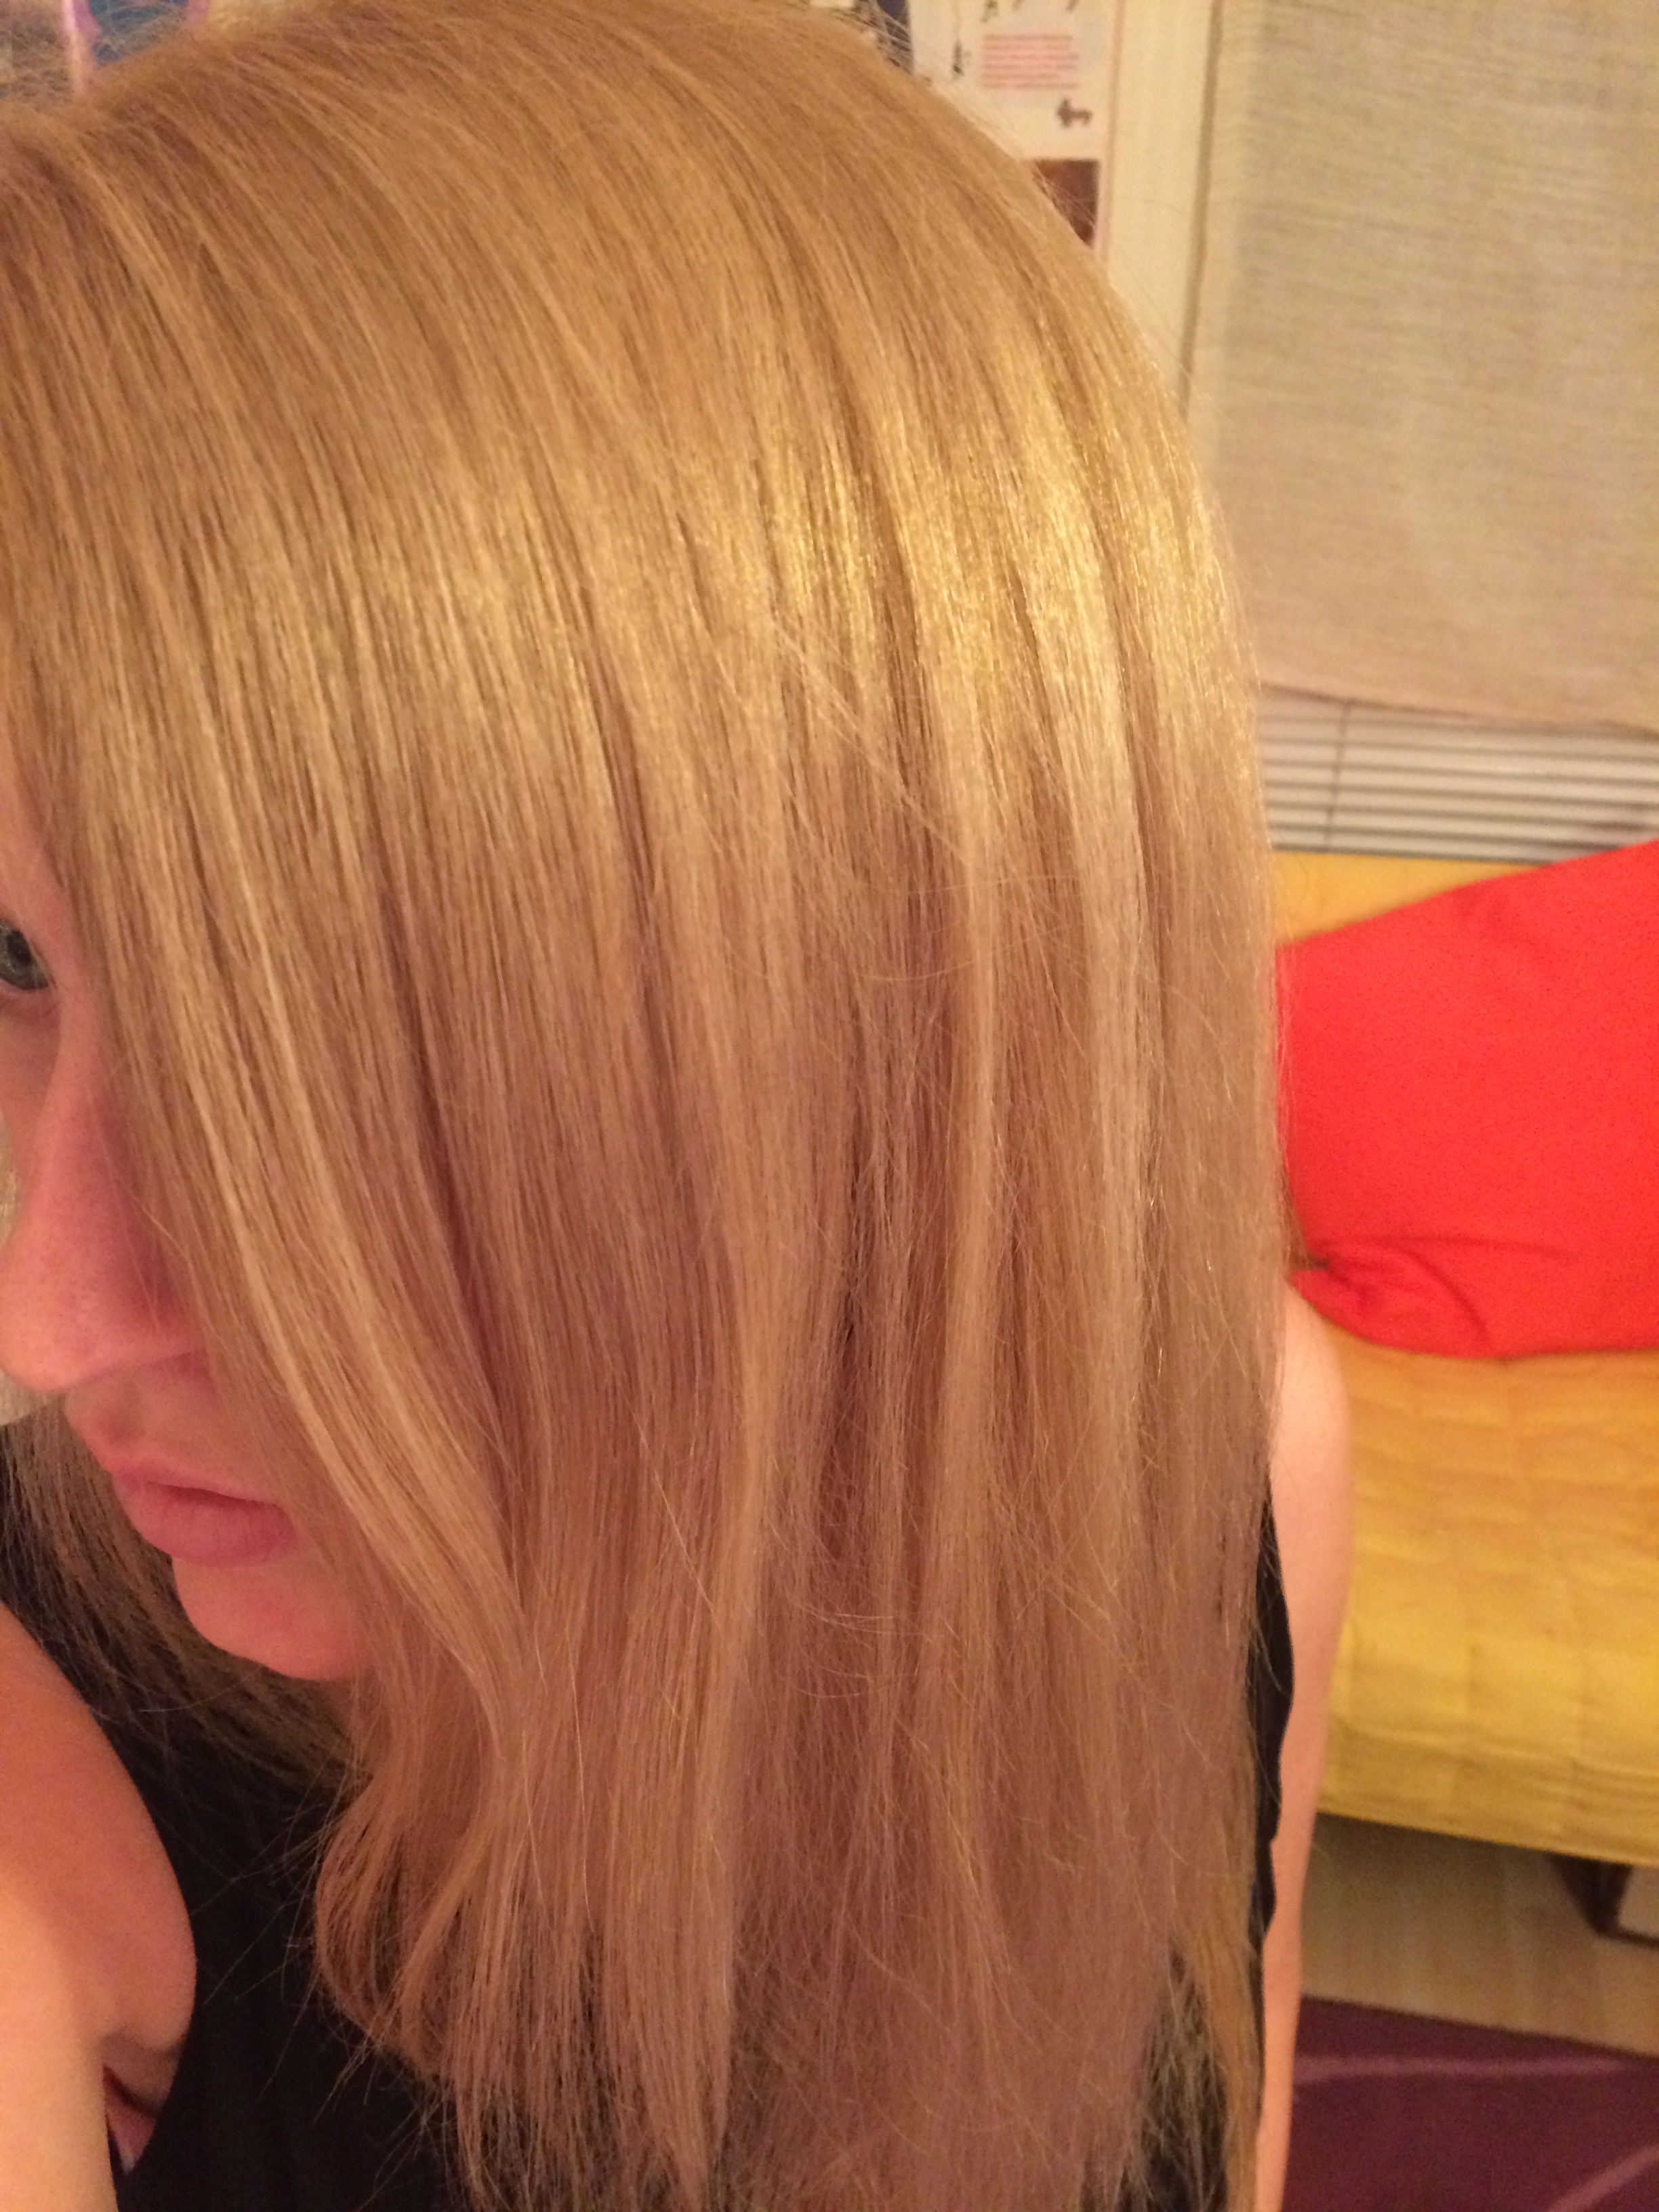
Some colors that I’ve tried and loved were Surf Side Blonde, Honey Blonde (with violet undertones- gorgeous!), and Light Neutral Blonde. It helps to have a friend with you to give their opinion on what color looks good. Scott was the one who picked out Honey Blonde, a true favorite. There are many brands, all with tons of options. It can be overwhelming, so decide ahead of time what general color you’re going for. Are you touching up roots? Are you looking to make a change?
It’s actually less overwhelming than you’d imagine once you’re in Sally’s. I usually use Clairol or Wella (just personal preference), and find I prefer Wella’s color selection best for blondes. Then there are usually just two shelves of different blonde dyes to pick from, and it’s easy to see which one is most exciting, most you. This is true of all hair colors.
Game plan:
- Pick your brand. Try Clairol or Wella if you’re a beginner and don’t know what you are looking for. Great color selection and great quality.
- Decide if you want DEMI PERMANENT or PERMANENT. Permanent means you’ll have this color until your roots come in and then it’s time to touch up your roots. Permanent will cover gray hair. Demi means it will fade out in a few shampoos, leaving you with the color you had before. Demi is great if you’re trying something new and unsure how well it will work on you.
- Choose your color!
- Remember your developer and supplies.
- Read the instructions, wear your gloves, and get to dyeing! For vivid colors (like if you’re giving Manic Panic a go), you should research the process further, since sometimes leaving it in longer than recommended helps the color stay longer, and conditioner immediately after is not recommended the way it is with other dyes.
I hope this helps! It’s been a learning process for me and now it is one of my favorite parts of my beauty routine. I just picked up Wella’s DARK BLONDE today! It should be quite a change. First I had tried the Demi-Permanent version of one a shade lighter (with more gold than dark blonde), and enjoyed the results. I am going darker so that I don’t have to dye as often, since these light golden blondes I’ve been favoring lately mean a lot of touch ups. I have always hated seeing my roots at all. Somehow Carrie Bradshaw pulls them off, but I’m more into the flawlessness of Gwen Stefani’s hair color- no roots there!

Good luck & have fun!
-Taylor


Where can i buy this in doha?